Posts Tagged collections care
Lillian Schwartz Collection: Beginning the Journey
In 2021, The Henry Ford acquired the papers of noted computer-generated film and new media artist Lillian F. Schwartz as part of the larger Lillian F. Schwartz & Laurens R. Schwartz Collection.
The papers, perhaps the most complex set of materials ever brought into the holdings of the archives and library at The Henry Ford, contain multiple formats, including documents, graphics, audio, still and moving images, and books in both physical and digital forms.
In addition to the archival and library materials, the larger collection includes many three-dimensional items, such as sculpture, clothing, and large framed artworks, with our collections management and registrar staff being responsible for the care of those items.
The collection’s journey to the archives and library began by receiving the shipment into a large project area in Henry Ford Museum of American Innovation, and then unwrapping and unloading pallets.
Photo by Brian Wilson
Photo by Brian Wilson
Boxes were sorted so that we could check them against existing inventory lists and create additional inventories if needed. Any unlabeled boxes were given temporary paper labels so that they could be tracked.
As the inventories were reviewed, determinations were made about where materials would be stored in the Benson Ford Research Center (BFRC). Storage locations were specified based on the format of the material with, for example, film being placed in cold storage, and books being transferred to library storage.
Once we understood how much we had and where we wanted to put it, we began making shelf space in the BFRC. Many existing collections had to be relocated to create room, with location data for each of those collections requiring updates in our collections management system. In several cases, moving a collection required moving one, two, or three other collections to make efficient use of available shelving. In the end, we made 95 shelves and 16 flat file drawers available for the Schwartz papers. With each shelf being 40 inches wide, this added up to over a football field in length of shelving!
Photo by Brian Wilson
Photo by Brian Wilson
The newly cleared shelves and drawers were slowly filled with boxes and folders over several weeks as the materials were moved from the museum to the BFRC.
Photo by Brian Wilson
Photo by Brian Wilson
In addition to storing the physical materials, we’ve also been reviewing the electronic data included in the papers. Located on multiple “carriers,” including computers, external hard drives, and backup disks, the data includes thousands of text, image, and video files. We’re noting the type, storage size, manufacturer, and part and serial number for each carrier and have created disk images of the most recently used hard drive to improve access to and preserve that data.
Our next steps in this journey will be to expand and refine the original inventories by reviewing the entire collection in the BFRC box-by-box, folder-by-folder, and hard-drive-by-hard-drive with the goal of creating a single master inventory. This inventory will become the starting point for access to the papers for our staff and researchers.
Be sure to visit our Digital Collections to see items from the entire collection that have already been digitized, and contact the archives and library at research.center@thehenryford.org if you’d like more information on this collection—or any of the hundreds of others in our holdings.
Brian Wilson is Senior Manager of Library and Archives at The Henry Ford.
2020s, 21st century, women's history, technology, Michigan, drawings, Dearborn, computers, collections care, by Brian Wilson, art, archives, #Behind The Scenes @ The Henry Ford

Firestone Farmhouse and Firestone Barn during reconstruction in Greenfield Village, December 1984. / THF118159
Two centuries ago, in the 1820s, Peter Firestone began the construction of his new farmstead in Columbiana County, Ohio. It eventually comprised a sturdy brick home, a very large barn, and several small outbuildings. The task took him, his family, and numerous local craftsmen many years to complete. The farmhouse alone is said to have taken four years; it is possible the entire complex may have taken as many as ten years.
When The Henry Ford acquired Firestone Farmhouse and Firestone Barn in 1983, the first challenge we faced was moving them to Dearborn, Michigan, from their original location in eastern Ohio—some 200 miles away. We decided the only feasible method was to completely disassemble the buildings, pack the materials into trailers, and transport them to Greenfield Village, where we would reenact Peter Firestone's feat.
Research and Disassembly
Our project commenced in April 1983, when an architectural recording team began to measure the structures to be moved and created drawings that would be used for their reconstruction. The team noted the condition of the buildings, researched their history, and began to develop theories about the changes the structures had gone through over the years. Armed with architectural plans and documentary evidence, we began a careful probing of the buildings to uncover information about their construction.
We took paint samples from wood surfaces and analyzed them microscopically to help identify layers of paint applied over time. We also removed brick and mortar samples for chemical analysis. At this time, we discovered former stair locations, old room partition placements, blocked-up doorways, and the remnants of a fireplace in the farmhouse. Our examination of the barn revealed much about its original form and the changes made to it in the early 20th century. Our team recorded the location of mortises for missing framing members and incorporated patterns of the original construction into the drawings.
In conjunction with this work, we conducted two other types of research—archeological research and architectural field research. Evidence from an archeological dig to locate outbuildings that had once been part of the historic farm proved inconclusive, but we did uncover a large quantity of artifacts that helped establish how the farmhouse had been furnished in the past. As part of our architectural field research, we surveyed more than 200 area farmsteads. After analyzing our material, we went back to conduct an in-depth study of 25 barns resembling Firestone Barn, as well as various other 19th-century outbuildings.
We began disassembling the structures by removing and numbering interior woodwork and doors, which were then packed into trailers. Our team removed plaster and lath from ceilings and partitions. Then, we took up floorboards from all three levels of the farmhouse, numbered them, and placed them into trailers. In this same way, all the elements of the farmhouse interior and roof were disassembled and readied for shipment to Greenfield Village.
Next, restoration specialists took apart the masonry structure of the farmhouse brick by brick. They cleaned the bricks onsite and packed them with straw in shipping crates. As the brick walls came down, we removed window and door units intact. Then, the masonry specialists prepared the farmhouse’s sandstone foundation for disassembly. They numbered each stone on the interior face (which had several layers of whitewash on it) and photographed each wall surface with its numbering pattern showing. As the masons removed the stones, they again numbered each one on its top bedding surface. The stones, too, were cleaned and packed with straw in crates, and the number of each stone was listed on the outside.
Masonry restorers removed each brick from the walls of Firestone Farmhouse. After being cleaned of excess mortar, the bricks were packed with straw in the crates in the foreground. / THF149938
The barn was stripped of its 20th-century additions, siding, and roof to expose the frame of the building for disassembly. The wooden pins anchoring each timber joint had to be driven out so that the posts and beams could be taken apart in the reverse order of their assembly. Prior to removal, each timber was numbered with a color-coded plastic tag that identified its location in the frame. Timbers less than 40 feet long were loaded into trailers. Those that were longer—for example, one floor support beam that measured 68 feet—had to be shipped on a special stretch trailer.
Disassembly of Firestone barn at its original site, Columbiana County, Ohio, 1983. / THF628361, THF628363, THF628367, THF628369
Discoveries
Each stage of disassembly yielded more information about the original construction and subsequent alterations of the buildings.
In the barn we discovered the original granary and hay chute arrangements. Analysis of historic photographs and field data brought to light the "drive-through" equipment shed/corn crib that had been almost obliterated by 20thcentury alterations. We also unveiled early 19th-century changes to the structure, including a tool and storage room on the second level and subdivisions of the stalls on the first level.
The farmhouse continued to divulge more of its secrets. Evidence of major interior and exterior renovations turned up daily, as we found reused materials from the original construction in every conceivable portion of the later construction.
This bedroom doorway, which had been closed off during Firestone Farmhouse’s 1882 renovation, came to light during the disassembly process. / THF149936
We made one very exciting find while moving a section of hand-decorated plaster ceiling above the central stairway. Attached to a framing member associated with the farmhouse’s renovation was a scrap of paper inscribed, “James Maxwell Washingtonville Ohio 1882 / Harvey Firestone Columbiana Ohio 1882.” Aged 12 and 14, respectively, these boys had left a "secret" message, and we had been the lucky finders. Census research established that James Maxwell was the son of a plasterer. He was probably helping his father with interior renovation for the Firestones. Since we knew from the account book of Harvey Firestone’s father, Benjamin, that the renovation of the exterior of the farmhouse had been accomplished in 1882, the note proved conclusively that the interior renovation had been done at the same time. This helped influence our choice of 1882 as the restoration period for the entire farm.
This hidden message enabled us to precisely date Firestone Farmhouse’s 1882 renovation. / THF124772
Firestone Farm in Greenfield Village
While all this work was taking place in Ohio, we transformed Greenfield Village in anticipation of the farm's arrival. Workers cleared a seven-acre area designated as the farm site for development. We moved six buildings to new locations in the Village; eliminated four non-historic buildings from the area; constructed three new buildings for behind-the-scenes activities to replace those displaced by the farm; and relocated a portion of the railroad tracks.
By the end of 1983, four trailers, two large stacks of over-sized beams, and no fewer than 250 crates of brick and stone were all onsite awaiting the spring construction season. While planning for the entire farm restoration continued, workers began to reproduce a substantial portion of the barn that had been lost to 20th-century alterations. We purchased white oak logs, and craftsmen began hand hewing and joining timbers to recreate most of the original ground-floor framing, which had been replaced by modern materials. This process alone, excluding the actual erection of the timbers, took four craftsmen nearly three months to accomplish. Later in the project, additional components had to be created to replace portions of two sheds initially attached to the main barn. These had been drastically altered for 20th-century farming needs. The upper portions of the barn required numerous replacements and repairs, though most of this part of the frame had been unchanged from its original construction.
In May 1984, we broke ground for the foundation of both the farmhouse and barn. Throughout the summer and into the fall, the masonry shell of the farmhouse rose slowly from the foundation toward the roof line, with windows, doors, and floor framing incorporated during the process. The task of restoring each basement stone to its original location and replicating the brick bonding was tedious and time-consuming. To replace damaged bricks, we manufactured replicas in three different shades to match the originals in color variation, as well as in shape and texture. The entire masonry shell of the farmhouse was finally completed late in the fall, just as plunging temperatures threatened to stop the project. Winter weather halted most outdoor activity, and a temporary roof was placed on the building until late the next spring.
Masons set the transported stones back into Firestone Farmhouse’s new foundation. Here, the author assists by referring to composite photographs of each of the basement walls. / THF149926
The largely reproduced lower frame of the barn was erected in the summer, with repairs and minor replacements to the large upper section of the building continuing into the fall. After trial-fitting and adjusting individual portions of the upper stories, workers reassembled them in sections called “bents.” Each bent was lifted into place, then connected to another by struts and top plates to create the full frame. The erection process for the three-tier main frame lasted until December, when production of the attached sheds began. We completed roofing and siding of the main barn in the winter months as work on the remaining portions of the sheds moved offsite and indoors to escape the cold weather.
The author in May 1985 with a portion of the scale model constructed to assist in the restoration of the barn. The ramp side of the nearly completed barn is in the background. / THF149932
We restored the interior of the farmhouse during the first four months of 1985, placing each numbered floorboard, wall stud, wall plank, and door or window trim piece in its original location. At the same time, we repaired or replaced damaged materials using the same type of materials in the original construction. We applied new plaster to lathed stud walls and ceilings, as well as to the brick walls of the interior, then reinstalled additional trimwork that had covered the old plastering. Finish work then began on the interior surfaces of the farmhouse in preparation for whitewashing, painting, and papering. Carpenters moved outside at this time to restore the three porches that had been built in 1882. We finished painting the exterior in early June 1985.
With the coming of spring, we resumed outdoor work on the barn. We completed the attached sheds and massive stone ramp that leads to the upper floor of the barn, then moved our work inside. We attached plank floors with wooden pegs in the threshing area; restored the granary and tool room; and placed packed earth floors in the animal stall area on the ground level. We constructed new doors based on historic photographs, field studies, and an extant door—one of three types used for the barn.
The restoration of the farmhouse and barn did not represent a complete recreation of the Firestone farm. Additional elements helped establish the environment of an operating farm of the 1880s. We reproduced a pump house next to the farmhouse using historic photographs, archeological evidence, and field research data. We also acquired a period outhouse in Ohio, restored it, and placed it in the yard behind the farmhouse. We then erected a chicken house—modeled after examples shown in agricultural literature of the period—adjacent to the barn, as well as a fence enclosure for hogs. To complete the experience, we built more than 7,000 linear feet of fencing to match historic photographs of fields at the farm’s original site.
Over a period of almost two and a half years, we moved the Firestone farm from Ohio to Michigan and meticulously and accurately restored it to its physical condition of a century earlier. The process required an understanding of the historical record, the careful handling of tens of thousands of historic architectural objects, and the reproduction of thousands of missing elements. It may not have equaled Peter Firestone's feat 160 years earlier, but it did honor his effort, as well as that of the millions of 19th-century farmers who contributed to our country's agricultural heritage.
Blake D. Hayes is former Conservator of Historic Structures at The Henry Ford, including during the move and reconstruction of the Firestone farmstead. This post was adapted by Saige Jedele, Associate Curator, Digital Content, at The Henry Ford, from an article in Volume 14, Number 2 of the Henry Ford Museum and Greenfield Village Herald (1985).
Ohio, 1980s, 20th century, research, Greenfield Village history, Greenfield Village buildings, Greenfield Village, Firestone family, farms and farming, conservation, collections care, by Saige Jedele, by Blake D. Hayes, #Behind The Scenes @ The Henry Ford
Reading an Artifact: The Reconstructed Detroit Central Market Vegetable Shed
 Panoramic view of the reconstructed vegetable shed from Detroit Central Market on April 10, 2022. The entrance that originally faced south is front and center in this view. / Compiled from two photographs taken by Debra A. Reid
The vegetable shed from Detroit Central Market, opening this week in Greenfield Village, provides the perfect opportunity to be a building detective! You can practice your powers of observation as you explore this open-sided structure. In the process, you can become a more informed observer of the built environment around you.
The following highlights should whet your appetite to learn more about this “shed.” Originally, it sheltered vendors who helped feed hungry Detroiters for more than 30 years, from April 1861 to February 1894. Then it spent 110 years on the upper end of Belle Isle sheltering horses, operating as a public riding stable, and as a storage facility for the City of Detroit. The Henry Ford acquired it in 2003, saving it from demolition. Then, between 2003 and 2021, we conducted research and raised funds to reconstruct it in Greenfield Village. Now you can explore the reconstructed Detroit Central Market shed starting its new life in the heart of Greenfield Village.
Is This Building a Reconstruction?
Rudy Christian, a traditional timber-frame expert and principal of Christian & Son, Inc., describes the Detroit Central Market shed as a reconstruction. He bases this on his experiences dismantling the structure in 2003, advocating for use of original materials and prepping the timber-frame elements, and reassembling the roof system during reconstruction in Greenfield Village during 2021.
The Secretary of the U.S. Department of the Interior (DOI) first defined “reconstruction” in 1978 as “the act or process of reproducing by new construction the exact form and detail of a vanished building, structure, or object, or a part thereof, as it appeared at a specific period of time” (Federal Register, Vol. 43, No. 236, December 7, 1978, page 57251). You can read more about the DOI’s standards for the treatment of historic buildings and landscapes here, including more about reconstruction and the other three standards: preservation (when the property retains distinctive materials and thus conveys historic significance without extensive repair or replacement), restoration (removal of features to return a property to an appearance of a particular time in the past), and rehabilitation (retention of a property’s historic character, but modifications may occur given ongoing use).
What Percentage of the Building Is Original?
The Detroit Central Market vegetable shed, while “new construction,” is authentic because of the significant percentage of original material incorporated into the reconstruction. Fifty percent of the columns (16 of 32) are original. The 16 originals are distinctive because of acanthus-leaf details on the bases, a spiral design, and capitals onto which cast S-scroll leaf ornaments are mounted.
Architectural S-scroll leaf ornament from the Detroit Central Market, 1860. / THF177806
These original cast-iron columns, however, are brittle. It is impossible to calculate their tensile strength—that is, the maximum stress that the cast iron can stand when being stretched or pulled before breaking. Modern code requires structural materials to meet tensile-strength specifications. This posed a significant challenge.
How Can We Meet Modern Building Codes with an Historic Structure?
The facilities team at The Henry Ford contracted with O’Neal Construction, Inc., of Ann Arbor, Michigan, on the reconstruction of the Detroit Central Market building. They were involved in all phases of the planning process and oversaw reconstruction from 2021 to its completion. The team considered different options to support the building, but ultimately selected an innovative solution that exceeds code requirements. In effect, the solution involved flipping the structural support upside down.
Alec Jerome, Director of Facilities at The Henry Ford, explaining the invisible framing system that anchors the vegetable shed on August 26, 2021. / Screenshot from THF Conversations: A Market Shed in its 160th Year
Ensuring guest safety required construction of an underground “moment frame” that anchors the structure and prevents it from acting like a huge umbrella on a windy day. The above screenshot shows the system of rebar that runs between the 48-inch-deep footers. The footers extend up to octagonal bases, or piers. These footers also accommodate modern infrastructure—specifically, electrical conduit that runs underground and up into the piers. All 32 columns are attached to the individual piers with anchor bolts, but 16 of the 32 columns are steel and specially designed extensions of the moment frame. As a whole, the moment frame ensures that the structure will remain on the ground and standing in perpetuity.
The entrance that originally faced north on April 10, 2022, now behind Hanks Silk Mill in Greenfield Village. There are original columns at both sides of the side-entrance gable, but rows of specially designed columns, integral to the moment frame, visible to both the left and right of this side-entrance. / Photograph by Debra A. Reid
The 16 new columns are distinctive from the originals in several ways. They are smooth, not spiral. They have fluted gussets (brackets) at the top, instead of capitals. Finally, they are larger in diameter than the originals. These distinctions make clear which columns are original and which are not, to inform guests of the innovation required to ensure their safety.
How Does the New Footprint Compare to the Original?

What was originally the west entrance, now facing State Street in Greenfield Village, on April 10, 2022, with original columns as well as additional columns installed in two rows in front of the structure. This gives guests a better impression of the original building footprint, though an additional eight columns would be required to mimic the full original size of 11 bays and 242 feet in length. / Photograph by Debra A. Reid
The reconstructed vegetable shed is 7/11ths as long as the original. Why 7/11ths? The original structure was three bays wide by eleven bays long. A bay is the space between architectural elements. You can see the eleven bays visible on the south side of the structure in the detail below from a late-1880s photograph—five bays from the east-facing entrance to the south-facing entrance, with that entrance bay being the sixth bay, and then five bays beyond it to the west-facing entrance (less easy to see given the perspective). The Central Market building towers in the distance.
Detail of the vegetable shed from the Detroit Central Market, circa 1888. / THF200604
The reconstructed Detroit Central Market vegetable shed in Greenfield Village includes only seven of the eleven original lengthwise bays—three on each side of the side-entrance bay. Thus, the reconstruction is 7/11ths the length of the original. Jim McCabe, former collections manager and buildings curator at The Henry Ford, deserves credit for this specification, as he spent nearly two decades working on the project between 2003 and 2022.
The reconstruction is true to the width of the original, three bays total—one on each side of the central entrance, which is also a bay. You can see these bays most clearly in this July 6, 2021, photograph below, showing columns in place and the roof structure in process.
Detroit Central Market reconstruction in process on July 6, 2021, showing the three-bay width and the seven-bay length. / Photograph by Debra A. Reid
How Much of the Timber-Frame Roof Is Original?
The timber-framing system is clearly visible inside the structure. Just walk in and look up! Approximately 80% of the original old-growth white pine was reused in the reconstruction. This resulted from careful detective work during the quick dismantling process.
The Henry Ford contracted with Christian & Son, Inc., to number and measure the original structural and decorative woodwork elements, photograph them, and prep the material for storage. Then we contracted with Jeff DuPilka and West Shore Services, Inc., to disassemble the structure. West Shore, Christian & Son, and staff from The Henry Ford accomplished this in 10 to 12 weeks during the summer of 2003. at Belle Isle, Detroit, Michigan, 2003")
Woodwork in one of four outside corners, original to the vegetable shed at Detroit Central Market and still intact after it served as the riding stable at Belle Isle, Detroit, Michigan (photographed in 2003). / THF113493
Christian & Son, Inc., documented all original wooden elements, including those in the section of the building that was fire-damaged due to a car wreck (visible in the photograph below). They believed that documenting the whole required documentation of all parts, so they took as much care tagging, measuring, and dismantling this burned section as they did with the other sections. In fact, timbers from the charred section were reused in the reconstruction and are visible on the exterior of the originally east-facing entrance (the entrance now facing the Detroit Toledo & Milwaukee Roundhouse in Greenfield Village). at Belle Isle, Detroit, Michigan, 2003")
West Shore Services, Inc., crane in action, removing a piece of the original timber-frame roof system from the former riding stable (and originally the Detroit Central Market vegetable shed) on Belle Isle, Detroit, Michigan, 2003. / THF113575
What Are Some Notable Details?
The reconstruction of the Detroit Central Market vegetable shed in Greenfield Village includes ornamental woodwork throughout. The following rendering by architecture firm Quinn Evans itemizes seven distinctive brackets, each designed for a specific location in the building, and one “drop,” an accessory at all four gable entrances and used with the decorative fascia along the eaves.

Decorative wood details of the Detroit Central Market vegetable shed, prepared by Quinn Evans, Ann Arbor, Michigan, for The Henry Ford. / Courtesy of The Henry Ford’s facilities team
These decorative elements were all hand-carved during the original construction in 1860. Not all of the decorative elements survived the move to Belle Isle. The elaborate crests atop each of the four gable entrances on the Detroit Central Market vegetable shed, for example, were not included when it served as the horse shed on Belle Isle, as the illustration of it in Seventy Glimpses of Detroit indicates. Missing pieces were replicated to complete the structure’s appearance during its heyday as a public market.
Jim Johnson, Director of Greenfield Village & Curator of Historic Structures and Landscapes at The Henry Ford, starting to inventory architectural elements from the Detroit Central Market vegetable shed not used in the reconstruction, February 8, 2022. / Photograph by Debra A. Reid
What Style Is the Building?
Each of the ornamental elements was part of a stylistic whole that the reconstruction faithfully conveys. If it reminds you of a Swiss chalet, you have an astute eye for style. John Schaffer, the architect, trained in Munich, Bavaria, and incorporated Schweizerstil (Swiss-chalet style) details into his plans, drafted in 1860. Thus, this structure likely introduced that aesthetic to Detroiters. His plans included gently sloping gabled roofs with wide eaves, large brackets, and decorative fretwork, all details common to Swiss-style architecture. Additional Swiss features included sawtooth siding, scroll-sawn fascia, and the elliptical design of the siding at each gable-end.
The Detroit Central Market vegetable shed has so much to teach. Learning to read the details of this addition to Greenfield Village is an important first step on the journey. Learn even more by checking out additional blog posts and artifacts related to Detroit Central Market.
Debra A. Reid is Curator of Agriculture and the Environment at The Henry Ford. Comments from Rachel Yerke, Curatorial Assistant at The Henry Ford, improved this post.
Additional Readings:
- Farmers Market
- Bring the Detroit Central Farmers Market to Greenfield Village
- Detroit Central Market Coming to Life
- Greenfield Village Reopens for 2022 Season April 16 with First Permanent Addition in More Than 20 Years
#Behind The Scenes @ The Henry Ford, collections care, making, design, Michigan, Detroit, Detroit Central Market, by Debra A. Reid, Greenfield Village buildings, Greenfield Village

Unknown artist, “Lady in a Lace Bonnet,” located in Robert Frost Home in Greenfield Village, before conservation. / Photo by Marlene Gray

The same painting, after conservation. / Photo by Marlene Gray
It is that time again, as Greenfield Village opens this week for another exciting season! While you were away, staff at The Henry Ford have been busily cleaning and repairing objects throughout the village buildings. During the winter months, conservation staff move artifacts in need of repair back to our labs for a bit of TLC. Some of these objects are on full display while others hardly ever get the spotlight. One of the latter objects is a painting rarely seen by visitors.
View of Robert Frost Home with the parlor on the right. / THF1883
Within the Porches and Parlors district of Greenfield Village is the home of American poet Robert Frost. Originally located in Ann Arbor, Michigan, the house was moved to the village by Henry Ford in the 1930s. As you enter the house, a parlor is on the immediate right. If you look inside on the left, you will see a frame on the wall. There hangs a portrait of a woman, “Lady in a Lace Bonnet.” During routine maintenance, our dedicated clean team noticed the painting had some paint losses, which you typically find with old paintings. The paint losses at the top and bottom of the painting were the most obvious. These types of losses can occur when the painting is roughly handled during framing.
Image courtesy of clean team member Teresa McCloud, who noted the damage.
Conservation staff then brought the artwork to the lab to give this hidden painting some much needed attention. Once the painting was removed from the frame, the next step was a good cleaning. Paintings trap abrasive dust and debris, both on the canvas behind and the painted surface. After vacuuming to remove the larger debris, a very mild cleaning agent was used to remove the surface grime collected over the years. What a drastic change that made!
Grime cleaning, with right side cleaned. / Photo by Marlene Gray
Still, the portrait had a yellow tint, visible in the sitter’s face, which is a tell-tale sign of an aged varnish. Various solvents were tested to see what worked best at removing the old varnish, and we selected one that did not cause harm to the paint surface. After the varnish was removed, the portrait looked much brighter and fresher.
Varnish removal, with left side cleaned. / Photo by Marlene Gray
Once our lady was cleaned, it was time to tackle the paint losses. Color-matching the surrounding paint is tricky and takes patience to get right, but when we do, it is so rewarding to see the complete image. Last but certainly not least, a new coat of varnish with stabilizers that resist the harmful effects of ultraviolet radiation was added to protect the painting from light from the window on the other side of the parlor.
After securing the painting back inside the frame (being sure not to scratch the surface), we whisked it back to Frost home, tucked into its “hidden” spot. Now you know what hangs on the wall, and you may even be able to get a little peek from outside the parlor window on your next visit. The lady will be happy to show off her fresh appearance!
“Lady in a Lace Bonnet” returned home. / Photo by Marlene Gray
Marlene Gray is Senior Conservator at The Henry Ford.
collections care, conservation, Greenfield Village buildings, Greenfield Village, #Behind The Scenes @ The Henry Ford, by Marlene Gray, art, paintings

Ackley Covered Bridge in Greenfield Village. / THF1914
Guests visiting Greenfield Village in the spring of 2001 encountered a newly transformed Ackley Covered Bridge. The landmark structure—one of the most recognizable, most photographed sites on the grounds—had been completely repaired and restored. While the bridge’s resurrection may have seemed to have happened miraculously, it was—as with all our restoration efforts—the result of meticulous planning and careful completion of a well-defined project.
Originally constructed in 1832 in southwestern Pennsylvania, the single-span, 80-foot bridge’s design dates back to 16th-century Italy and was adapted in a uniquely American way in the early 1800s. It is referred to as a multiple kingpost truss: a series of upright wooden posts, with all braces inclined from the abutments and leaning towards the center of the “kingpost.”
Ackley Covered Bridge was originally a community project, built by more than 100 men on land owned and with materials donated by brothers Daniel and Joshua Ackley. By the mid-1930s, it had fallen into serious disrepair, and when a modern bridge was constructed to replace it, the granddaughter of one of the builders purchased the hundred-year-old Ackley structure for about $25 and donated it to Henry Ford.
Views of Ackley Covered Bride on Wheeling Creek near West Finley, Pennsylvania, 1937. Browse more photos of the bridge on its original site in our Digital Collections. / THF235241, THF132888, THF235221
Simple and classic in its construction, the bridge was dismantled at its original location in late 1937 and shipped by rail to Dearborn. Modifications were made to ensure its longevity, and a number of basic preservation chores were undertaken in the six months between its arrival and the completion of reconstruction in July 1938. (You can view photos of the bridge’s reconstruction and dedication in our Digital Collections.)
Ackley Covered Bridge after reconstruction in Greenfield Village, June 30, 1938. / THF625902
“Even in the 1930s, the Ackley Covered Bridge was clearly an architectural treasure, and Ford and his designers knew its importance and placed it at the heart of the Village,” said Lauren B. Sickels-Taves, architectural consultant for the restoration project. The bridge was back in its prime, spanning a pond designed specifically for it.
Taking photographs near Ackley Covered Bridge in Greenfield Village, 1958. / THF625878
“Unfortunately, the pond was standing rather than flowing water, and the water level had the ability to rise and fall,” she said. “The chords and four end trusses of the bridge (basically, its feet) were exposed to extreme wet/dry cycles, and rot was imminent. By 1974 the bridge was structurally unsound, and dangerous.”
While repairs were undertaken then, nothing was done to regulate the level of the pond, and by the spring of 1999, one truss end was found to be rotting. Closer examination revealed that the bridge was once again structurally unsafe.
Alec Jerome, then part of the facilities management team he now leads at The Henry Ford, was designated as project leader to bring Ackley Covered Bridge back to stability. David Fischetti, a historical structural engineer from North Carolina with a background in covered bridges, was brought in to develop a plan to properly restore the bridge, and Arnold Graton of New Hampshire, one of the country’s leading covered bridge timberwrights, was selected to lead the stabilization and restoration work.
“First,” said Jerome, “the pond had to be drained to expose areas that needed repair. The conditions that we discovered led to some serious revisions in our original project plan—every beam touching the ground was rotting and needed to be replaced.”
Views showing restoration of Ackley Covered Bridge in Greenfield Village, September and October 2000. / THF628587, THF628611, THF628525
The dry rot portion of the original trusses was removed and new support beams were spliced on. The refurbished trusses were then seated on stainless steel plates to prevent moisture from wicking up into the wood. Also, a turnbuckle system was implemented in the upper beams of the bridge, which had become separated over time, to ensure stability. Many of the connectors holding the bridge beams together were replaced, and ultimately a bolster was laid to eliminate any conditions that would promote rot in the floor beams and allow that devastating wet/dry cycle of rot to begin again.
“Our main concerns were the extensive amount of rot over and above the original expectations, the short time period between Village programs in which we had to complete the work, and weather conditions getting in our way,” Jerome said. Work began the day after Old Car Festival in September, and lasted through the day before the start of the evening program, The Legend of Sleepy Hollow, the second week of October. “The project could not have been completed without the assistance of the Museum’s carpentry department and our welder,” Jerome said. “These people assisted with every facet of this restoration.” See more photographs from the restoration project in our Digital Collections.
According to conservator Sickels-Taves, research determined that Ackley Covered Bridge was the oldest multiple kingpost truss bridge and the sixth-oldest covered bridge in the nation. While the cost of its restoration after a century and a half of decline was substantial, its preservation for the future was priceless—without such key commitments of resources, important structures like Ackley Covered Bridge would be lost forever. “The bridge is unquestionably important,” Sickels-Taves said. “We should be proud, and not hesitate to brag that we are the steward of one of the earliest forms of original American architecture.”
A version of this post originally ran in the Spring/Summer 2001 issue of The Henry Ford’s former publication, Living History. It was edited for the blog by Saige Jedele, Associate Curator, Digital Content, at The Henry Ford.
roads and road trips, Greenfield Village buildings, Greenfield Village, collections care, by Saige Jedele, Ackley Covered Bridge, #Behind The Scenes @ The Henry Ford

Men’s Suit, circa 1800. / THF29848
Textiles are some of the least durable artifacts that we have in the collections of The Henry Ford. Early textiles are usually made from the “big four”—cotton, linen, silk, and wool. All these materials can disintegrate, be eaten by insects, make homes for mice, and be degraded by mold and mildew. In addition, heat and light affect the color and the integrity of the fabrics. Here at the museum, we are fortunate to have a representative sampling of garments and textiles from the 18th century to modern times.
What We Know about Our Suit
Even though we don’t know who wore the suit or exactly when, it still directs us to a point in time.
This suit has no known provenance (specific history), having been acquired from Anna Brix, an antiques dealer who lived in Philadelphia. The suit is believed to be French or British, but we have no records linking it to a person or even a family. We don’t know exactly when it was made, but this style lasted through the 18th century. By comparing it with similar garments, we can agree that it was probably worn for the first time in the late 18th century. We can tell it is a late-18th-century jacket because the fit is slim, the front is worn unbuttoned and curves to the back, and overall the cut is shorter than in previous decades. It was likely worn to court, or at least to very formal occasions. A suit such as this would have been worn with a highly decorated waistcoat, silk stockings, a cotton or linen shirt with fancy cuffs, and a jabot (frill or ruffle). The back has dual tails and three vents, making it easier and more stylish to wear when mounted on a horse. The colors are all natural dyes and have held up well with age.
Close-up of embroidery. / Photo by Joan Sheridan
The Making of the Suit Coat
Suits such as this were made to attend court and other high occasions, often mere days before they were needed. Hence, the use of embroidered panels, which reduced the time the tailor needed.")
Embroidered panel for a different waistcoat, uncut. / From the collections of Cooper-Hewitt, Smithsonian Design Museum (1962-54-31)
The coat is made of silk taffeta and was embroidered before the suit was made with silk threads using French knots, satin stitch, and stem stitch. Well-to-do men would visit a merchant to select a color and embroidery pattern, often from the shelf. The merchant would then coordinate with a tailor to custom-make the suit. The embroidered fabric, shown in the example above, even included embroidered rounds that would be crafted into fabric covered buttons by the tailor.
Showing cut to shorten jacket at the top right of the pocket. / Photo by Joan Sheridan
The embroidered silk was originally made for a taller man than ours. If you look carefully at the image above, you can see where the embroidery was shortened at pocket height. It is blunt cut—sometimes the embroiderers were brought in to camouflage the adjustment and make it less visible, but not in this case. This is the normal position for a height adjustment, as when the wearer stood with their hands clasped in front of them, the seam was covered.
Embroidery on buttons on back of coat. / Photo by Joan Sheridan
Additional piecing is visible on the back of the garment at the top of the side vents where curved embroidered pieces back the accent buttons.
Discovering the Secrets of the Suit
Being able to look closely at the suit, both inside and out, was a rare treat.
Markings from original button placement are visible above top of cuff; also, the slightly lighter color of silk shows the depth of lengthening. / Photo by Joan Sheridan
Upon closer examination, the outside of the suit tells us even more. The jacket sleeves have been made about two inches longer. There is less wear above the cuff and pin pricks can be seen where the buttons were originally located. It is interesting that the cuffs both show significant wear at the bottom from before and after remodeling.
The knee breeches were refitted to accommodate a larger person. Each side seam was let out, and there, similar to above the coat cuffs, you can see lighter silk with less wear. Finally, the back of the breeches have a wedge of silk inserted to give more room. Small areas of stress at the waist and the drop flap were mended to provide strength, but the breeches are in good condition structurally.
Weighted Silk Is Fragile
Silk has a long and harrowing history, and this suit is a good example of why the use of weighted silk has been greatly reduced in the last century.
Shattered silk at the right shoulder and collar. / Photo by Joan Sheridan
We estimate that the coat was relined in the mid-to-late 1800s, as the lining was shattered throughout because it was made using weighted silk. Then and now, silk was sold by weight. When raw silk is processed, up to 30% of its weight is lost when the sericin (the protein that holds silkworm cocoons together) is cleaned from the tough but delicate fibers. Manufacturers compensate for that loss by adding metal salts to the silk, which adhere to the fabric, causing it to weigh more. What they didn’t know then is that this will forever damage the fabric. Shattered silk cannot be repaired and continues to disintegrate with age. The practice of weighting was regulated by the Federal Trade Commission in 1938 to require labeling of silks containing more than 10% metal salts (15% for silk colored black).
The suit’s shattered lining was in poor condition (see image above) and we decided that it should be replaced with modern, non-weighted silk in a matching color. This also allowed us to see what was inside the garment—where the story continues.
A Rare Treat: Viewing the Inside
Seeing the internal structure produced answers and questions.
A quilt of patches, buckram, and pocket provides insight into the speed with which the coat was made. / Photo by Joan Sheridan
Suits such as these were often hastily made. The outside was sumptuously beautiful with even, neat stitches, but the inside, not so much! The inside would never be seen.
It took many hours to extract the lining from the suit. The stitches that attached the lining to the coat were exceptionally fine and firm. Removing them took small scissors, tweezers, and, at times, a magnifying glass. With the lining separated from the jacket, more interesting things were revealed. It isn’t often that you get to see the original inner-workings of an 18th-century tailor’s creation (see image above).
Mildew and fibers from wear prior to vacuuming. / Photo by Joan Sheridan
One thing that was immediately noticeable was that the light blotches on the outside of the garment were caused by mildew. At some point, the suit was stored in a humid environment. The mildew was an old problem, since our museum storage is climate controlled, but the residue still had to be removed. Since a liquid cleaner could not be applied to the silk, the inside of the coat was vacuumed through a screen, then a stubby paintbrush was used to lift mildew spores before vacuuming again. This treatment made a noticeable difference in appearance.
Buckram stiffens the inside of the front of the coat. / Photo by Joan Sheridan
Inside we see the use of buckram as a stiffener around the edges of the front, much as interfacing would be used today. Buckram was and is made of a coarse hemp, linen, or cotton fabric. The buckram was pieced, perhaps because it was scraps, or perhaps that was how wide the fabric was. Cream-colored silk had been sewn over the buckram from the pocket level to the collar, possibly to reduce friction between the silk and the stiffening fabric (see below).
The left shoulder linen tow shoulder pad covered with the original silk. / Photo by Joan Sheridan
Linen tow was used as padding to create the sloped shoulder shape popular in the late 18th century. This linen waste is full of bits of the stem of the flax plant and it has held together and done its job for over 200 years. The tow was—and is—partially covered by the original white silk lining.
A History Mystery
Anytime we deal with historic objects, there are often more questions than answers. It is interesting to try to suss out the “why?” and apply what we know to arrive at possible solutions. However, some mysteries will always remain mysteries.
Squiggles on the right pocket—partially for mending, but they beg the question, why? / Photo by Joan Sheridan
The stitching used inside the coat is often coarse. A larger thread was used to bind seams, keep the shoulder pads in place, and attach silk to the buckram. Inside is a patchwork of fabric. The linen pocket linings revealed another interesting find. Both pockets had holes that were inexpertly darned with a snakelike pattern that continues from the darning. We can surmise that the original wearer of the suit was right-handed because the right pocket is very stained—by tobacco or a handkerchief, perhaps?
Replacing the Lining
The lining adds support to the garment, transferring stress to itself and away from the fragile and elaborate embroidery and construction.
Pattern making from the shattered silk lining. / Photo by Joan Sheridan
Once removed, the fragile lining was separated into pieces to be used for making a new pattern. From the pattern a polyester sample lining was made and fitted into the jacket. Adjustments were noted on the paper pattern and revisions made until it was as close as it could be. Polyester is not a substitute for silk, as it behaves differently, but it did serve a purpose—knowing that the pattern was close enough.
Small tools and thread are less likely to damage the delicate fabric. / Photo by Joan Sheridan
With the modified pattern in hand, the cream silk was cut and sewn in with a few minor modifications. The lining was attached using a long blind stitch, unlike the original whip stitching. Changing the stitch type reduced the number of holes that had to be put into the garment, and fewer stitches mean less damage to the original green fabric.
The finished collar and newly lined coat, before pressing. / Photo by Joan Sheridan
With the body lining sewn in, the neck lining was next. The edge of the collar was quite worn and treatment was required. A piece of bronze tulle (fine netting) was sewn to the outside edge of the collar next to the main body of embroidery, but not over it. It was then stretched over the damaged area and attached to the inside of the collar. The collar lining was cut freehand because the original is in many pieces. Once the lining was in place, the tulle mend became nearly invisible.
Finishing the Work
The sleeves are very of-the-period. They are curved in shape and tell the story of a suit that was worn often and remodeled in its second life. The sleeve remodeling was likely done at the time the lining was replaced in the mid-1800s.
Two levels of wear are evident on the sleeves. / Photo by Joan Sheridan
Conservation Specialist Claire Zimmeth completed the project by mending the sleeves and sewing in the sleeve lining. Since there was damage at the end of the original sleeve length and at the end of the remodeled/current length, it was decided that the entire area should be covered with tulle. Again, the tulle was placed to avoid covering embroidery (see the work-in-progress image below).")
Covering the sleeves with tulle (in progress). / Photo by Joan Sheridan
Bringing It All Together
This suit is an excellent example of 18th-century tailoring, style, color, and embroidery talent. It reminds us that court styles didn’t change much over more than a hundred years and didn’t keep up with the current fashions.
Working on this garment was challenging, mainly in that there is always concern about handling fragile, antique textiles. It was a privilege to work on the suit and be able to explore the history of the suit via the wear, stitches, and inner construction. Even though this jacket has no formal provenance, it still has a story to tell. The suit will be on display in the Fashion and Nature exhibit at the Grand Rapids Public Museum from April 23–July 23, 2022.
Photo by Mary Fahey
Joan Sheridan is Volunteer Textile Specialist at The Henry Ford.
18th century, making, fashion, conservation, collections care, by Joan Sheridan, #Behind The Scenes @ The Henry Ford

The Sir John Bennett tower clock. / Photo by The Henry Ford. / THF53988
The quarter-hour chime of the Sir John Bennett tower clock is a memorable sound that can be heard throughout Greenfield Village, emanating from its four figures—the muse, Gog, Magog, and Father Time (shown right to left above). Early in 2021, Magog’s chime and striking arm developed cracks along the mechanical shoulder.
Recorded damage of Magog’s chiming arm. / Photo by Andrew Ganem.
Disassembly of Magog’s arm prior to cleaning. / Photo by Andrew Ganem.
The arm was disassembled by Conservation Specialist Andrew Ganem, and conservation and curatorial staff were faced with a decision to repair the original arm or to replace it with a replica. One of the major concerns with repair was that new cracks could develop in the already thin (0.04”) sheet metal when Sir John Bennett becomes operable again. After some discussion, we made a decision to replicate and replace the arm to allow for safe operation of the clock, while preserving the original component in storage for future reference.
The replica arm could not be easily replicated using conventional copper metalwork techniques because of its highly textured surface. An easier replication method came from our partners at Ford Motor Company, who proposed the use of 3D scanning and polymer printing. To accomplish this, the original arm was 3D scanned and that data imported into a computer-aided design (CAD) program. The replica arm was then printed using stereolithography (SLA) 3D printing. You can learn more about this type of printing here.
Image courtesy Ford Motor Company.
Image courtesy Ford Motor Company.
Image courtesy Ford Motor Company.
The scanned model of the arm was produced by Daniel Johnson and Kevin Lesperance at Ford Motor Company’s metrology lab.
A side-by-side comparison between the SLA 3D-printed copy on the left and the original artifact on the right. / Photo by Cuong Nguyen.
The 3D-printed part is tested for fit prior to electroplating by Ford Motor Company’s Erik Riha on left and The Henry Ford’s Andrew Ganem on the right. / Photo by Cuong Nguyen.
The SLA plastic material wasn’t strong enough to endure continuous use in the outdoor environment of Sir John Bennett’s tower clock, so Ford engineers proposed coating the replica polymer part with nickel and copper layers using electrical deposition. The nickel layer stiffened the print, while the copper layer offered a better surface for painting.
Test for fitting the plated arm onto Magog. / Photo by Cuong Nguyen.
Holes in the cast iron mount for the arm. / Photo by Cuong Nguyen.
The use of an appropriate painting system that could endure the outdoor environment in Greenfield Village was imperative. Dr. Mark Nichols of Coatings, Surface Engineering, and Process Modeling Research at Ford Motor Company and Dan Corum of PPG recommended PSX-One (high solids, acrylic polysiloxane.) Amercoat 2/400 was used as a primer, as it provides chemical, environmental, and moisture resistance. The paint colors on the original arm were matched to a color sample and duplicated by Andrew Wojtowicz of PPG.
Original arm, left; 3D-printed arm, right; and Munsell color sample in the middle. / Photo by Cuong Nguyen.
The primed surface on the shoulder and elbow was coated with oil sizing and gilded with 24-karat gold.
Left to right: SLA-printed replica; copper/nickel/copper-plated SLA replica; copper/nickel/copper-plated SLA replica primed, painted, and gilded, ready for use; and original artifact part for comparison. / Photo by Cuong Nguyen.
During a test assembly, we noted that the linkage that connects Magog’s arm to the chiming mechanism was too short, so Andrew fabricated an extension and attached it to the original linkage. He also fabricated new hardware for the elbow joint to accommodate the additional thickness of the replacement part.
Extension fabricated by Andrew Ganem. / Photo by Andrew Ganem.
Photo by Cuong Nguyen.
Elbow joint. / Photo by Cuong Nguyen.
Original and machined hardware. / Photo by Andrew Ganem.
Magog’s clapper for the bell striker required attention by Andrew and The Henry Ford’s welder Chuck Albright, who soldered the joint between the cuff, wrist, and grip for the strike (hammer). A vibration isolator (made from Sorbothane) was inserted to reduce shock between the clapper and the arm during operation.
Separation between the hand and the wrist. / Photo by Cuong Nguyen.
Required surface preparation for a strong solder repair. / Photo by Andrew Ganem.
The size of the fist. / Photo by Andrew Ganem.
Special thanks to Dr. Mark Nichols, Dr. George Luckey, Erik Riha, Daniel Johnson, and Kevin Lesperance at Ford Motor Company, and to Daniel Corum and Andrew Wojtowicz at PPG. The help from Ford Motor Company specialists and their fabrication equipment made the project possible without invasive modifications to the artifact part.
We also extend a grateful thank you to Jason Hayburn, whose generous donation funded the electroforming of the replica.
Cuong T. Nguyen is Objects Conservator at The Henry Ford.
Michigan, Dearborn, 21st century, 2020s, technology, Sir John Bennett, philanthropy, Greenfield Village buildings, Greenfield Village, Ford workers, Ford Motor Company, conservation, collections care, by Cuong Nguyen, #Behind The Scenes @ The Henry Ford

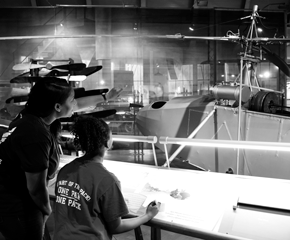
The Mathematica exhibit in Henry Ford Museum of American Innovation. / Photo by KMS Photography
When Henry Ford Museum of American Innovation reopened in July 2020 after months of shutdown because of COVID-19 restrictions, museumgoers were excited to be back on the floor. Many of them were super excited to get back to one of their favorite exhibitions, Mathematica—a favorite because it’s so hands-on.
And therein lay the problem, said Jake Hildebrandt, historic operating machinery specialist at The Henry Ford. As COVID-19 spread, the hands-on interactivity of Mathematica caused it to remain closed. Mixing a little bit of ingenuity, technology, and lots of problem-solving skills, Hildebrandt, along with master craftsman Brian McLean, ensured the exhibition could remain interactive yet hands-free and open to the public.
Mathematica’s Moebius Band was modified by staff from The Henry Ford to start via a hand wave. / Photo by Jillian Ferraiuolo
The push-start buttons on the Moebius Band and Celestial Mechanics installations, for example, are now initiated with a wave of the hand—no touch necessary. And the 27-button panel of the Multiplication Machine has been covered with Plexiglas for safety and new software installed so random math problems run on the cube throughout the day for visitor education and enjoyment.
A newly-added note under the Plexiglas installed on the Multiplication Machine in Mathematica reads “This machine has been temporarily modified for a touch-free experience / It now multiplies random numbers on its own.” The styling of the note is intended to match the original design of Charles and Ray Eames. / Photo by Jillian Ferraiuolo
“Projects like these, DIY challenges that have high criteria, limited time and budget, are my favorite kinds of projects,” said Hildebrandt. All the alterations to Mathematica are easily reversible, he added, and when you head to the museum to see them, you’ll notice the respectful attention given to the exhibition’s classic Eames styling.
This post was adapted from an article first published in the January–May 2021 issue of The Henry Ford Magazine.
#Behind The Scenes @ The Henry Ford, The Henry Ford Magazine, making, Henry Ford Museum, healthcare, design, COVID 19 impact, collections care

Cars are just one type of artifact that have found a good home in our new collections storage facility, the Main Storage Building. / Photo courtesy Cayla Osgood
With more than 26 million artifacts in our collections at The Henry Ford, storing them all can be a challenge—especially the large industrial, agriculture, and transportation objects. That changed a few years ago, when we began working on an exciting and important project for our institution—the creation of our Main Storage Building, or, as we call it, MSB. Our staff answer a few questions about our newest storage building below.
What is MSB?
MSB is a 400,000-square foot building adjacent to Henry Ford Museum of American Innovation. Ford Motor Company occupies the front half of the building, while The Henry Ford occupies the rear 200,000 square feet of space. Today, 178,000 square feet of the MSB is used exclusively for collections storage. The remaining space in The Henry Ford’s portion of the building is home to shipping and receiving, our photo studio, office space, and institutional non-collections storage.
This 1936 photo of the Ford Engineering Laboratory building gives a sense of its scale. / THF240744
What is the history of the building?
Built in 1923–1924, the Ford Engineering Laboratory housed Ford Motor Company’s tool design, production engineering, and experimental engineering research departments. Henry Ford and Edsel Ford both had offices there and, throughout Henry’s lifetime, the lab was the true heart of Ford. The facility was expanded and remodeled several times over the years but had been vacant for some time before the agreement between Ford Motor Company and The Henry Ford was reached.
You can view hundreds of photographs and other artifacts related to the history of the Ford Engineering Laboratory in our Digital Collections, and you can learn about the design of Henry and Edsel’s offices in the building in this blog post.
Though we only recently acquired the building, this is not the first time our artifacts have been stored at MSB. This 1926 photo shows objects collected for the not-yet-completed Henry Ford Museum being stored in the Ford Engineering Laboratory. / THF124539
How did we acquire our portion of the building?
In 2016, we entered into an agreement with our neighbor, Ford Motor Company, to acquire half of the Ford Engineering Lab building. The contract allows Ford to occupy the front half of the building for office space and their corporate archives, while The Henry Ford occupies the rear 200,000 square feet, now referred to as the Main Storage Building, as full owner of that portion.
The Henry Ford’s collections management staff was very happy to visit MSB on our first day of possession, before any artifacts had been moved in. / Photo courtesy Cayla Osgood
Why did we decide to consolidate our collections storage?
Like many museums, The Henry Ford has faced challenges in storing and caring for our holdings, especially the large industrial, agriculture, and transportation artifacts that make up much of the collections. For decades, we rented offsite warehouse space to house these materials. With them came problems—poor accessibility, overcrowding, landlord and lease challenges, and an inability to invest appropriately in rental property. We have made huge strides in caring for and preserving our collections by moving into MSB, including improved access, easy-to-maintain storage environments, enhanced security, and a reduction of overcrowding in storage areas.
Pallet racking and thoughtfully packed artifacts allow us to fit tens of thousands of objects, both large and small, into MSB, while ensuring both their safety and ease of access. / Photo courtesy Cayla Osgood
How did we consolidate our collections storage?
As you might expect, moving tens of thousands of irreplaceable artifacts, many of them large, heavy, and/or fragile, from offsite storage into a new building was a challenge. Learn more about this long and complex process in this blog post.
How much of THF’s collection is housed in MSB?
The MSB represents more than 70 percent of The Henry Ford’s total collections storage space. The building currently holds over 40,000 artifacts, with more than 10,000 of these digitized and available for browsing in our Digital Collections.
Agricultural implements hang from a wire grid within MSB. / Photo courtesy Cayla Osgood
What types of artifacts are stored in MSB?
Within MSB, you’ll find items from our Michael Graves Collection, Westinghouse Historical Collection, Lillian F. Schwartz & Laurens R. Schwartz Collection, Industrial Designers Society of America Collection, Bruce and Ann Bachmann Glass Collection, Bobby Unser Collection, and American Textile History Museum Collection, to name just a few. The artifacts it holds were created as early as the 16th century and as late as this year, and represent a century of institutional collecting, dating back to Henry Ford’s early collecting a full decade before our official dedication in 1929. You can see some staff-selected highlights from MSB in this expert set.
What types of collections work happen in MSB?
In MSB we had an opportunity to create a new collections operations workroom that acts as a collective workspace for multiple teams, including collections management, registrars, curatorial, and photography. In the workroom, we see collections items both existing and new to the collection. Types of work include cataloging and numbering (for tracking), creating storage mounts and boxes, and staging for research. We also pack artifacts to lend to other institutions.
Our conservation department utilizes two different lab areas to treat all artifacts requiring attention in the MSB—everything from vehicles to glass. Photography of smaller objects happens in the photo studio in MSB or in the workroom, while large object photography happens throughout the building—meaning our photography team is quite adept at working with a variety of space and other constraints. You can read more about some of our large object photography projects in MSB in this blog post.
Large artifacts such as these might be photographed in or near their storage locations in MSB for maximum digitization efficiency. / Photo courtesy Cayla Osgood
Beyond this ongoing work, we are still completing our move into the building—all 40,000+ artifacts are being organized, inventoried, and positioned into their permanent locations throughout MSB.
What enhancements are planned for MSB in the future?
As a significant addition to our campus, many enhancements are planned for MSB to optimize the structure for historic collections. Currently, we are continuing important infrastructural work, like roof maintenance and HVAC upgrades, so our collections have appropriate environmental controls to ensure their physical integrity for many years to come.
Once that is complete, we can turn our attention to maximizing our square footage for both access to the collections and issues of density. Specially designed storage furniture called compact shelving helps alleviate wasted aisle space while keeping objects safe and accessible to curators for research, exhibits, and digital uses. As we unpack, this type of storage furniture will allow us to make the most of the 178,000 square feet we have so that we can continue to collect well into the future.
We are so pleased to have this new space and look forward to sharing much more about the work we’re doing and collections we’re housing in MSB!
collections care, Main Storage Building, #Behind The Scenes @ The Henry Ford
While we have a photo studio where we do most of our artifact photography using white backgrounds and strictly controlled lighting, many times we encounter things that are too big for this setting—for example, a car! In those cases, we need to take ourselves and our studio on the move, and our newest collections storage building, the Main Storage Building (MSB), gives us a perfect environment for that. While sometimes space can be an issue (there are only so many places you can store dozens of wagons and plows), we make the most of the room we have and get creative in the meantime.
For example, to photograph “The Busy World” automaton wagon, it first needed to be moved out of a row of wagons and into an open space to give us room to set up our lights and camera.
“The Busy World” automaton wagon in storage in MSB before photography. / Photo courtesy Jillian Ferraiuolo
The completed photograph of the automaton. / THF187282
Since the Unimate robot was featured in an episode of The Henry Ford’s Innovation Nation, we needed to capture new photographs of it for our Digital Collections before the episode aired. While we had a little more room to work when photographing the Unimate (this was before MSB was as full as it is today), we still benefitted from having the ability to set up all around it because it is extremely heavy and cannot be easily moved. We had to use the space around it to access both sides for our standard photography.
Photographing the Unimate. / Photo courtesy Jillian Ferraiuolo
Completed photo of the Unimate robot. / THF172780
It was a similar situation when we photographed the 1977 Ford Mustang II. Though now this area in MSB houses an array of agricultural equipment, such as plows and wagons, in 2018 we were able to use the open area to photograph the Mustang II for the first time so it could be viewed online.
Photographing the Mustang II. / Photo courtesy Jillian Ferraiuolo
Completed photo of the Mustang II. / THF173560
This next example shows a more current look at MSB in 2021. As you might be able to see, there are many more vehicles now occupying the large area where we shot the Unimate and Mustang II. So when we were tasked with the job of photographing a 1925 Yellow Cab, we were unable to circle around it and had to work with our collections management team to move the taxi for us as we documented it.
Photographing the 1925 Yellow Cab taxicab. / Photo courtesy Jillian Ferraiuolo
You can also see that we created our own white background around the cab with tall foamcore boards (a little thing that helps immensely with post-processing in Photoshop). But our “studio” was surrounded by another car to the right and a wagon to the left! All this careful maneuvering and setup was necessary to get the final image.
Final photograph of the 1925 Yellow Cab Taxicab. / THF188014
Looking at the completed image, you probably would never know what it looked like when we were photographing it out on the floor in MSB!
My final example, the Ford COVID-19 mobile testing van, was so tall that it almost reached the ceiling in the tallest room in MSB. Since it’s a full-sized van, it isn’t easy to move—especially inside a building. In case that isn’t enough, its current neighbors in storage happen to be a couple of large fire engines. Regardless, we got creative again and we were able to get photos of the van despite these challenges.
Photographing the Ford COVID-19 mobile testing van. / Photo courtesy Jillian Ferraiuolo
Completed photo of the COVID-19 mobile testing van. / THF188109
Besides being an invaluable space to store an extensive variety of precious artifacts from our collections, MSB also serves as a functional space for us to use as photographers—so we can digitize artifacts even if they’re larger than we can accommodate in our photo studio.
Jillian Ferraiuolo is Digital Imaging Specialist at The Henry Ford.
Main Storage Building, photography, photographs, digitization, collections care, by Jillian Ferraiuolo, #Behind The Scenes @ The Henry Ford