Posts Tagged conservation
Throughout the month of November 2020, we’ve been celebrating reaching the milestone of 100,000 digitized artifacts by sharing out blog posts and fun facts, hosting Twitter chats with our digitization staff, and counting down the 20 most-viewed artifacts in our Digital Collections. In case you missed any of these great resources, we wanted to share them all here for easy reference.
If you follow us on social media, you might have seen the “top 20” countdown of our most-viewed digitized artifacts of all time, but if you’d like to get a broader look, you can check out the top 100 in this Expert Set. Fans of The Henry Ford will recognize many of the artifacts, but there may be some on the list that surprise you.
The Henry Ford's all-time top 20 most-viewed digitized artifacts. Do any of them surprise you?
Here, also, are all of the fun facts about our digitization program and our Digital Collections that we shared out on social media.
Twenty fun facts about digitization and our Digital Collections.
During the first week of November, we provided a general introduction to our Digital Collections, our digitization program, and our workflows.
- First was our announcement that we had just digitized our 100,000th artifact, and were kicking off the month-long celebration. You can also read our press release here.
- If you’re interested in becoming an expert in using our Digital Collections, or just not sure where to start, this blog post will give you a run-down of the ways you can search, view, and use our digitized artifacts.
- Associate Curator, Digital Content Andy Stupperich shared how we add context to artifacts in our Digital Collections in this post.
- Saige Jedele, also an Associate Curator, Digital Content, took us behind the scenes with The Henry Ford’s Innovation Nation to discover how digitization helps shape the stories we cover on the show--and helps you to learn more afterwards.
- Like many other people around the world, a lot of our staff have spent time this year working from home. Find out how we continued to digitize artifacts despite the closure of our campus this spring in this post.
- As part of the William Davidson Foundation Initiative for Entrepreneurship, we've digitized nearly 2,500 artifacts from our collections. Find out more about the team and the process from Project Curator Samantha Johnson here.
- In our first live Twitter chat on November 5, I discussed our digitization program, digitization workflows, and a bit about what you'll find in our Digital Collections.
2020s, 21st century, research, photography, digitization, digital collections, conservation, collections care, by Ellice Engdahl, #digitization100K, #Behind The Scenes @ The Henry Ford
For the entire month of November, we at The Henry Ford are celebrating the digitization of over 100,000 artifacts! To reach a goal of 100K artifacts digitized takes many people and departments coordinating and working together. Let’s look at how our conservation department contributed to this momentous achievement. I’ll be highlighting one of the current projects in which digitization is a crucial step.
This graphic shows the various steps in The Henry Ford's digitization process, and where conservation fits in.
As Project Conservator on a three-year Institute of Museum and Library Services (IMLS) grant awarded to The Henry Ford, I work with other conservation and collections specialists to clean and stabilize 3D objects from our Collections Storage Building. These objects oftentimes have never been on display, let alone photographed. As conservators, it’s our responsibility to make sure the objects are not only camera-ready but are structurally sound for exhibition or museum storage. logo")
For this IMLS grant, the objects undergo a multi-step process involving many hands in order to get to digitization. First, objects are tagged by collections or conservation staff with a Tyvek label that states the object number (if known), description/identifying name, and location found in storage. This tag stays with the object throughout the various stages and is updated with staff initials as tasks are completed.
Objects are then vacuumed to remove surface dirt and/or mold before moving from the storage building to be cleaned thoroughly in the Conservation Lab. If the object is too large to handle, it stays in the building for conservation treatment performed in a section that has been zoned off as a clean room. Outside contractors bring in heavy-duty equipment to lift and move the bigger and heavier objects. rigged up for moving out of storage")
A Herschell-Spellman steam engine (27.139.1) rigged up for moving out of storage.
Caravan of large objects being moved out of storage!
If the object is an appropriate size for the IMLS team to handle and move by forklift or box truck, we bring it back to the Conservation Lab for cleaning and stabilization.
Due to the number of objects we conserve, not all get photographed in the lab. That will happen later! However, we do take before, during, and after conservation treatment photos for some objects that have interesting conservation treatments and/or a significant change from start to finish.
Check out a recent blog on the conservation treatment of this Megalethoscope (32.742.113).
Other staff are also involved in the IMLS grant, including registrars who catalog and attach a unique accession number to each object.
Quick photographs are often taken at this stage in order to research and find more information about the object.
Finally, the object is ready for its close-up! It moves down to our photography studio to be photographed under the proper lighting and with a professional grey backdrop. Sometimes the object is so large that is easier to photograph it in its new storage location. You can find all of these images in our Digital Collections on THF.org.
Here is a Pratt & Whitney Gear Cutter and Lathe, circa 1900, getting set up for photography in storage.
Click here to visit our Digital Collections and search for digitized artifacts!
As we are all facing challenges this year brought on by the COVID-19 pandemic, we have had to adopt new procedures to keep the process running smoothly! It has not been possible to photograph all objects included in the grant. Before the object leaves the conservation lab and moves to storage, though, it gets quickly photographed, and that image is attached to the record in our collections database.
At a later date, our photographer will take the beauty shot for Digital Collections and keep the tally rolling on our digitization numbers! As of today, over 3,500 objects have been pulled from storage, conserved, and rehoused during this three-year grant. Close to 3,000 of those objects have been digitized and are available online.
Photographer Rudy Ruzicska taking the perfect image.
The final step for these objects is moving to a new home in storage, going on loan, or display for THF visitors to see up close. We work with collections management staff to box, palletize, and wrap the objects before finding the perfect location in storage or sending them on their next adventure for public viewing. The objects from this IMLS grant are just a small portion of the 100,000 artifacts that have been digitized, but they also include some of the largest objects we have in the collection!
A couple of generators sitting in front of boxed and palletized objects in storage.
Let’s end with a blast from the past of The Henry Ford’s early digitization days in 2012. Here are a few images of what it took to digitize an abundance of hubcaps! Some of these you may have seen on display in the Driving America exhibit. The rest you can find in Digital Collections.
For an in depth look at hubcaps, check out this blog post.
Congratulations to all who have helped over the years to get so many of The Henry Ford’s artifacts digitized and accessible!
IMLS grant, #digitization100K, #Behind The Scenes @ The Henry Ford, by Marlene Gray, collections care, conservation, digitization

Comic book covers from the collections of The Henry Ford. See them in our Digital Collections here.
Comic books, like all things, change as they age and not necessarily for the better. Whether from the golden, silver or modern age, comic books are all printed on paper that is made from wood pulp. Lignin (a substance found in wood) breaks down and causes the paper to become increasingly acidic, discolored and brittle. Those of you who collect comic books have certainly seen and handled extremely brittle and discolored books. Conservators refer to this the inherent instability of wood pulp paper as “inherent vice.”
If you wish to preserve your comics, you need to take measures to combat this inherent vice by minimizing factors that accelerate deterioration. Steps that you can take to fend off inherent vice include:
- Limiting exposure to high levels of moisture, either in the form of water or high humidity. Both can damage comics and accelerate degradation.
- Avoiding exposure to ultraviolet and visible light, which can cause inks to fade and paper to become yellow.
- Using inappropriate non-archival storage or display materials, such as PVC vinyl plastic bags or boxes, inexpensive wood pulp cardboard boxes, wood pulp mat boards, wooden boxes or wooden frames. Contact with these can cause discoloration.
- Avoiding frequent handling.
In this video, recorded live in the conservation lab at The Henry Ford, Chief Conservator Mary Fahey demonstrates how to store, display, repair, and preserve your comic books.
What can be done to preserve comic books?
Take measures to limit exposure to moisture by placing books in archival bags or sleeves made from polypropylene, polyethylene or polyethyleneterephalate (Mylar).
Never store comic books directly on the floor.
Avoid storing books in attics, basements or other damp areas. If no alternative is available, use watertight polyethylene or polypropylene boxes and add a few silica gel packets conditioned to 45-50% relative humidity. The packets will need to be changed periodically.
Limit exposure to light including visible and invisible ultraviolet light. If you wish to display your comics, consider display methods that limit light exposure by avoiding display near windows and turning off the lights when you are not in the room. If you choose to display your books in a lighted showcase case, LEDs on a timer are the best option since they emit minimal ultraviolet light and minimal heat. At The Henry Ford, we have noticed that Mylar covers appear to block some of the damaging effects of light, providing some protection from fading.
All books should be bagged and boarded or encapsulated (see image below) for storage, display and handling. This protects them from dirt and moisture, minimizes flexing and stress of the fragile paper, and protects from the oil and salt in people’s hands. The use of archival materials and methods for storage and display can have a big impact on the longevity of your collection.
The use of acid-free, lignin-buffered mat board, boxes and paper inserts are recommended. These products are made from cotton, and generally contain calcium carbonate, which helps to neutralize the acid that is formed in the comic books as they age. They do cost a bit more, but are well worth it. The Henry Ford uses a variety of display and storage methods for comic books. Some examples include:
popular culture, conservation, comic books, collections care, by Mary Fahey
Imagine this: the Institute of Museum and Library Services (IMLS) project team is working in the Collections Storage Building, selecting objects to be conserved as part of our grant-funded work. From the top level of pallet racking, about 15 feet above the ground, we remove some pallets of boxes and bring them down to ground level to unpack. We then climb the moveable stairs to take a peek at the area that we have exposed. The sight that greets us is confusing, but intriguing: a giant, golden-toned teapot, sitting in the center of the racking, far enough back that it was not visible from the ground. It was almost like revealing a magic lamp! We test-lifted it and realized that it was very light for its size, and must be hollow, so we carefully moved it off of the racking and to ground level

The giant teapot trade sign as we found it in the Collections Storage Building (after we had moved it down from the top shelf).
From the bracket that we found on the handle, it quickly became apparent that this was some sort of a trade sign, likely for a tea shop or coffee house. The body of the teapot occupies a space about three feet on every side – it would have been a very eye-catching sign! A little bit of research led us to some other interesting examples, including one that currently hangs above a Starbucks in Boston and is set up to blow steam out of its spout!
Our teapot has some mysteries, though – the golden paint has some texture to it, as if there were at one point a stripe along the widest part of the teapot’s body, with vertical stripes reaching from that stripe to the lid. Was the teapot originally painted a different color, or with a pattern? We did some minor tests to see if we could isolate different layers of paint, but we were not successful. We might decide in the future to do a more thorough analysis, but that would be after discussion with the curators. We also noted that our giant teapot does not have a hollow spout, and therefore, despite being hollow, probably never had the mechanism to blow steam in the same way as some others.

The giant teapot on the table in the lab - you can really get a sense of how large it is!
Ultimately, we don’t know a lot about where the giant teapot was originally used, or where it may be displayed in the future. We treated this object with nothing more than a simple cleaning – it was overall very stable to begin with, just dusty and dirty from being in storage. By minimizing treatment to the point of only stabilizing the object, we are leaving the option open for a future conservator to do more work while still ensuring that it’s going to be safe and sound in storage. It also allows us to treat more objects from storage as we progress through the grant. Maybe someday in the future we’ll see the giant teapot again, but for now it’s safe and sound in the Main Storage Building! You can check it out in our Digital Collections.

The giant teapot after treatment, ready to go back to storage.
Louise Stewart Beck is Senior Conservator at The Henry Ford.
IMLS grant, conservation, collections care, by Louise Stewart Beck, #Behind The Scenes @ The Henry Ford

The Megalethoscope during treatment in the lab.
The Megalethoscope is one of thousands of objects from The Henry Ford’s Collections Storage Building (CSB) that is being conserved, digitized, and rehoused thanks to a ‘Museums for America Collections Stewardship’ grant from the Institute of Museums and Library Services (IMLS), received in October 2017. Heading behind the scenes, this blog will explain the process that an artifact moves through from conservation to photography—and eventually, becoming viewable on Digital Collections.
Conservation Treatment
Once an artifact is selected, tagged, and inventoried, it is given a preliminary cleaning with a vacuum and transported into the Conservation Lab.
(Left) Photo of how the Megalethoscope was found in storage; (Center) The instruction panel that shows how the Megalethoscope works; (Right) The Megalethoscope mounted correctly on its stand.
The top panels on the Megalethoscope before and after it was cleaned and waxed.
Prior to cleaning, a small spot was tested to determine the best method and materials to use. A mild detergent, diluted in distilled water did the best cleaning job without damaging the wood. The cleaning solution was gently rubbed on the wood surfaces with swabs to remove all of the dirt and grime, and then the surface was cleared with distilled water to remove soap residue. To bring back the shine of the wood finish, furniture wax was applied and buffed.
Years of storage on its end had caused the joints of the Megalethoscope’s viewer to separate (highlighted in red). Damaged areas were repaired removing the old, dried-up glue, and replacing it with fresh glue.
Large shrinkage cracks had developed in the two side panels that serve as light reflectors, and in the back panel that covers a large pane of glass. Shrinkage cracks develop when wood expands and contracts because temperature and humidity levels fluctuate too much.
Since the cracks were big enough to see through (approximately 1/8th inch wide) thin strips of Japanese tissue paper were soaked with a reversible adhesive, then dried, to fill each of the cracks. As each strip of tissue was compacted into the cracks, the adhesive was activated with solvent. This caused the dry paper to adhere to the edges of the crack and create a bridge. This fill was smoothed down flush with the rest of the wood panel, providing an even surface that could be in-painted to match the adjoining wood panels.
Using Japanese tissue to fill shrinkage cracks.
Watercolor and acrylic paints were used on the paper fills to hide the repairs and to paint in the large scratches and abrasions that covered the body of the Megalethoscope. To give the painted areas the same shine as the wood finish, a topcoat of acrylic gloss medium was applied.
(Left) In-painting the paper filled cracks; (Right) Paper fills after they were painted (in green).
To finish the treatment, the glass and mirror pieces of the Megalethoscope were cleaned with a solution of ethanol and distilled water, then wiped with microfiber cloths to prevent streaking. Any metal parts were cleaned with a mild solvent to remove small areas of corrosion and then waxed and buffed them to bring back their shine.
The Megalethoscope (Left) before and (Right) after conservation treatment.
Investigating Megalethoscope Slides
During treatment, an original photographic slide left inside of the Megalethoscope was discovered. This led to additional investigation. The slide depicted is of the Ponte dei Sospiri in Venice (the Bridge of Sighs). We wondered if there were more of these slides in the collection and after checking our collections database, found a box labeled “Megalethoscope Slides” in the Benson Ford Research Center (BFRC). The contents of the box were not catalogued, so we decided we needed to go to the Archives to see for ourselves!
When the box was brought to the Reading Room at the BFRC, we opened the box and found 21 slides, all in good condition! Many of the slides were photographs of Italy and Paris, plus a handful depicting interiors.
(Top) The Ponte dei Sospiri slide with handwritten inscription (Bottom) inside the Megalethoscope after it was taken out of storage.
Megalethoscope slides are large, multi-layered assemblies. Each slide consists of an albumen photographic image with pin pricks matching the areas where there is a light source or reflection (ex. an illuminated cityscape). Behind it are layers of colored tissue or cellophane and sometimes extra imagery when lit from behind; finally, there is a backing of a thinner, translucent canvas. All of this is stretched over a curved wooden frame. The curve creates a stereo view of the image which encompasses the viewer’s sight lines when they place their head into the Megalethoscope, much the way today’s virtual reality goggles work. Light is directed onto the slide to create different effects.
Cross section of a Megalethoscope slide. (Image courtesy of The American Institute for Conservation & Artistic Works, Photographic Materials Group Journal, Topics in Photographic Preservation 1999, Vol. 8, Art.5 (pp.23-30).
The slide that was found with the Megalethoscope in storage did not have any color effects, so we were excited to find that the majority of the slides in our archives had variations in color and optical illusions. The slides were moved to the conservation lab, where their surfaces were gently vacuumed. A smoke sponge removed any remaining dust and dirt. A few of the slides had small punctures or tears to the canvas, but since they were stable, we decided to not repair them at the present. We were thrilled to be able to reunite the slides with the Megalethoscope and have a fully functioning artifact!
(Top Left & Right) In "St. Mark's Square” you can see how people appear when light is applied to the image.
Photographing the Megalethoscope
The Megalethoscope on a cart for ease of movement during photography.
There are many steps that artifacts go through to be digitized and made available online, especially for objects as complex as the Megalethoscope. After the slides were conserved and cataloged, they were brought to the photography studio. For 3-D artifacts like the Megalethoscope, photography typically includes an image of the front, the back, and each side, if necessary. Photos serve as a reference material for historical researchers, and they document the condition of the artifact at that time.
The slides needed to be photographed in two ways: as they appeared in normal light, and as they would be seen through the Megalethoscope. Our senior photographer Rudy Ruzicska came up with a very clever arrangement to recreate this effect by placing two sets of milk crates with a sheet of Plexiglas suspended between them. He placed lights directly under and at an acute angle above the Plexiglas. The slides were placed in the middle of the Plexiglas with black paper border around the edges to prevent any light glare.

Light arrangement for photography of Megalethoscope slides. (Left) Rudy shooting with his custom set-up during the dark shot of the “St. Mark’s Square” slide; (Right) A closer view of the set-up.
The Megalethoscope images were then photographed under normal (“daytime”) light to document their appearance, and with their “nighttime” illumination effect by turning off the studio lights. The first time we saw the images illuminated in the dark, we all gasped – they became so vibrant and magical! 
A selection of the final images, with color and effects as they would have been seen inside the Megalethoscope.
The Megalethoscope was re-housed in a specially designed box which will store the unit and its base together safely, along with all of the slides. It was then moved to permanent storage in the Main Storage Building (MSB), as have most of the artifacts that we have worked on during the IMLS grant.
Thank you for joining me on this behind-the-scenes journey of an artifact from storage, to conservation, and through to digitization. I hope you enjoyed the ride!
Alicia Halligan is an IMLS Conservation Specialist at The Henry Ford
photography, IMLS grant, digitization, conservation, collections care, by Alicia Halligan, #Behind The Scenes @ The Henry Ford

The Budd Company approached American Motors Corporation in 1962 with this concept car, which placed a sporty body and a powerful V-8 on an inexpensive Rambler Ambassador chassis. Fearing it would fail, AMC decided against putting the car into production. Two years later, Ford's Mustang became a massive hit using the same idea of a sporty body on an existing chassis.
Learn more about getting this car ready for the 30th Motor Muster, then see it for yourself June 15-16 in Greenfield Village.
conservation, collections care, #Behind The Scenes @ The Henry Ford, car shows, Michigan, Dearborn, 20th century, 1960s, Motor Muster, Greenfield Village, events, convertibles, cars
This blog post is part of a series about storage relocation and improvements that we are able to undertake thanks to a grant from the Institute of Museum and Library Services.
In the course of our work as conservators, we get some very exciting opportunities. Thanks to a partnership with Hitachi High Technologies, for the past few months the conservation lab here at The Henry Ford has had a Scanning Electron Microscope (SEM) with an energy-dispersive x-ray (EDX) spectroscopy attachment in our lab.
 What does this mean? It means that not only have we been able to look at samples at huge magnifications, but we have had the ability to do elemental analysis of materials on-demand. Scanning electron microscopy uses a beam of electrons, rather than light as in optical microscopes, to investigate the surface of sample. A tungsten filament generates electrons, which are accelerated, condensed, and focused on the sample in a chamber under vacuum. There are three kinds of interactions between the beam and that sample that provide us with the information we are interested in. First, there are secondary electrons – the electron beam hits an electron in the sample, causing it to “bounce back” at the detector. These give us a 3D topographical map of the surface of the sample. Second, there are back-scattered electrons – the electron beam misses any electrons in the sample and is drawn towards a positively-charged nucleus instead. The electrons essentially orbit the nucleus, entering and then leaving the sample quickly. The heavier the nucleus, the higher that element is on the periodic table, the more electrons will be attracted to it. From this, we get a qualitative elemental map of the surface, with heavier elements appearing brighter, and lighter elements appearing darker.
  Conservation Specialist Ellen Seidell demonstrates the SEM with Henry Ford Museum of American Innovation volunteer Pete Caldwell.
The EDX attachment to the SEM allows us to go one step further, to a third source of information. When the secondary electrons leave the sample, they leave a hole in the element’s valence shell that must be filled. An electron from a higher valence shell falls to fill it, releasing a characteristic x-ray as it does so – the detector then uses these to create a quantitative elemental map of the surface. A ‘K’ from a stamp block, as viewed in the scanning electron microscope.
The understanding of materials is fundamental to conservation. Before we begin working on any treatment, we use our knowledge, experience, and analytical tools such as microscopy or chemical tests to make determinations about what artifacts are made of, and from there decide on the best methods of treatment. Sometimes, materials such as metal can be difficult to positively identify, especially when they are degrading, and that is where the SEM-EDX shines. Take for example the stamp-block letter shown here. The letter was only about a quarter inch tall, and from visual inspection, it was difficult to tell if the block was made of lead (with minor corrosion) or from heavily-degraded rubber. By putting this into the SEM, it was possible a good image of the surface and also to run an elemental analysis that confirmed that it was made of lead. Knowing this, it was coated to prevent future corrosion and to make it safe to handle.
Elemental analysis is also useful when it comes to traces of chemicals left on artifacts. We recently came across a number of early pesticide applicators, which if unused would be harmless. However, early pesticides frequently contained arsenic, so our immediate concern was that they were contaminated. We were able to take a sample of surface dirt from one of the applicators and analyze it in the SEM. An SEM image of a dirt sample from an artifact (left) and a map of arsenic within that sample (right).
The image on the left is the SEM image of the dirt particles, and the image on the right is the EDX map of the locations of arsenic within the sample. Now that we know they are contaminated, we can treat them in a way that protects us as well as making the objects safe for future handling.
We have also used the SEM-EDX to analyze corrosion products, to look at metal structures, and even to analyze some of the products that we use to clean and repair artifacts. It has been a great experience for us, and we’re very thankful to Hitachi for the opportunity and to the IMLS as always for their continued support.
Louise Stewart Beck is the project conservator for The Henry Ford's IMLS storage improvement grant.
philanthropy, technology, IMLS grant, conservation, collections care, by Louise Stewart Beck, #Behind The Scenes @ The Henry Ford
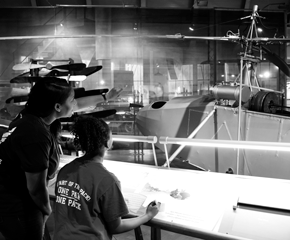
 In October 2017, Henry Ford Museum of American Innovation was awarded another Institute of Museum and Library Services (IMLS) grant, allowing us to continue working to catalog, conserve, package, and rehouse over 3,000 items out of our Collections Storage Building. We've had the opportunity to work with some very interesting objects for this grant, from agricultural equipment to advertisement signs. There is a wide array of objects passing through the labs, visible to the public through the windows at the back of the museum.
This spring we treated many batteries made by Thomas Edison. Most of these originated from the late 19th century and varied in condition and composition. These early battery types consist of metal plates that were immersed in an electrolyte solution to generate electricity. The batteries themselves were stable and safe to handle because they contained no electrolyte. The batteries with unknown compositions sparked our curiosity (pun intended), since we needed to know what they were made of so that we could properly conserve them.
Sometimes while working in the lab, we need specialized equipment that we may not have on site. Fortunately, museums often work collaboratively to help each other find solutions. In this case, we collaborated with Conservation Scientist Christina Bisulca and the well-equipped analytical conservation lab at the Detroit Institute of Arts. The DIA had the right tool for the job - a high-powered optical microscope and X-ray fluorescence (XRF) spectrometer. An XRF spectrometer is essential to conservators because it is used to identify metals. It uses an X-ray beam to produce enough energy to excite electrons within the atoms of metal elements. When that energy is released, a specific signal is registered within the XRF spectrometer and the metal is identified.
The DIA’s XRF spectrometer analyzing the central core of one of the batteries. (Photo courtesy of Misty Grumbley.)
At the beginning of March, we brought several batteries to test at the DIA, including an Edison-Lalande battery, a Samson battery, and an Edison S-Type battery. The Edison S-type battery was particularly interesting, since we were not able to find any similar batteries to compare it to, and could not confirm the materials used through research alone.
Continue Readingtechnology, power, Thomas Edison, Detroit Institute of Arts, collections care, #Behind The Scenes @ The Henry Ford, IMLS grant, conservation, by Misty Grumbley
In this blog post, conservator Louise Stewart Beck shared some incredible photographs of corrosion products that seemed to grow from the metal itself. We have found a lot of corrosion products where metal and hard rubber materials meet. In this collection, it happens frequently, and it makes sense to find these two materials so often due to the physical properties of the materials and their uses in regards to electricity.
Let’s start with the metal. Metals are strong materials, allowing the objects to withstand the working environments where they were used. Additionally, metals make great conductors, allowing the electricity to readily flow through the desired path along wires.
While metals are conductors, rubber is an insulator. This means it restricts the flow of electrons and prevents the electricity from transferring to separate entity—like a person—accidentally.
With this in mind, it makes sense that both metals and hard rubber would be found next to each other for the electrical objects to perform their function when first created. The long-term proximity of metal and hard rubber on these objects, unfortunately, also leads to active deterioration of the object. This situation is called inherent vice: The deterioration of physical objects due to the instability of the materials that make up the object.
Group of metal objects with hard rubber carrion on the surface. (Accession number 31.1217.252).

Detail of hard rubber corrosion on surface of the metal. (Accession number 31.1217.252).
When Louise and I encounter the strange corrosion products where hard rubber and metal touch, we end up removing the product of a chemical reaction occurring due to the physical properties of the two materials. If the corrosion product is only removed, it will be back in a few years because the chemical reaction has not been stopped by simply removing the corrosion. Whenever possible, a barrier is placed between the hard rubber and metal to keep them from chemically interacting with one another. Our barrier of choice is Incralac, a clear non-reactive coating. When possible, we apply the coating to the metal after separating it from the hard rubber and allow it to dry. Once dry and reassembled, the barrier layer should prevent the chemical reaction that results in the interesting corrosion growth.

Conservator Louise using a scalpel to mechanically remove the hard rubber corrosion. (Accession Number 31.1217.252).

Conservator Louise submerging metal in Incralac after removing corrosion to form a barrier layer between the metal and the hard rubber to prevent further corrosion. (Accession number 31.1217.252).
Of course, a lot of thought goes in to each treatment for each unique object, making working with this collection both challenging and rewarding. Understanding the ways objects are originally created that may cause or increase deterioration allows us in the Conservation Lab to actively work to slow this deterioration down to ensure the object can be enjoyed by visitors for years to come. Corrosion removed, waiting for the Incralac to dry. (Accession number 31.1217.252).
Mallory Fellows Bower is the IMLS Conservation Specialist at The Henry Ford.
by Mallory Fellows Bower, #Behind The Scenes @ The Henry Ford, collections care, conservation, IMLS grant
As we start a new year, it’s a good time to look back on the first half of The Henry Ford’s IMLS-funded grant to work on electrical objects, and to take stock for the future.
We had a busy and productive fall 2016, with some new adventures thrown in with continuing progress on objects themselves. If you haven’t already seen them, you should check out our Facebook Live videos – we’ve done a few so far (in October, November, and December), and the plan is to continue doing them on the first Friday of each month.
 Gaulard & Gibbs transformer on the shelf before treatment (29.1333.229).
This Gaulard & Gibbs transformer had several conservation issues when we first saw it, most notably that the wooden base had broken under the strain of the weight of the object itself. You can see this in the before picture, where the object is lying on its side because it cannot stand anymore. There are also faint hints of color along the metal tabs that run up the body of the object. The Gaulard and Gibbs transformer after treatment (29.1333.229).
You can see that this transformer had a fantastic transformation during conservation treatment – simply removing years of built-up dust revealed a very vivid red and black coloration. The broken wooden base was also very successfully repaired, and it is now possible for the object to stand on its feet again. When it’s packed for storage, it will be lying down again, so that the weakened wooden base isn’t put under too much strain for long periods of time.
We featured this object briefly in our Facebook Live videos – you may have noticed, if you tuned into both, that you could see the ‘before’ and ‘after’ as they happened.
The interior of a meter, with strange accretions on white enameled metal. Note that this view is of the reverse of the top face (29.1333.63)
We’ve also encountered some interesting materials and material problems in the first half of our IMLS grant work. One of the most interesting was this strange accretion, found on the interior of a meter. Those brownish bulbs appeared to be seeping into the object from the top, but were only present on the enameled portions of the metal. They were friable and lighter on the inside than the outside. We looked at samples under the microscope, and even attempted to culture a sample, in case it’s a type of mold (it does not appear to be). We’re still not sure what exactly they are, but we will continue to try to figure it out! Mysteries of the museum, indeed. An ohmmeter with a great example of hard rubber – note that the cylindrical casing which would usually go over the black area is removed in this photo (31.1217.235)
We have also recently come across a fantastic example of perfectly preserved hard rubber. The base of the object is one solid slab of hard rubber, but the protected interior area has retained the original black, mirror-like finish. The discoloration and matte surface of hard rubber occurs primarily from light exposure over time, and the colors possible range from a light black to the red-brown color on this object. We’ve put the exterior cylindrical case back on the object, sealing it well, so that the very tight case can continue to preserve this fantastic interior.  Conservator Cuong Nguyen and Conservation Technician Andrew Ganem working on motors in their lab.
We have also been very fortunate to have Cuong and Andrew working with us for a little while. They're tackling some larger motors, which take longer to complete. Their help allows Conservation Specialist Mallory Bower and I to continue to work at the pace necessary to keep the project on target, while ensuring that as much of the collection as possible is treated. We greatly appreciate their help.
As always, this is only a small sampling of what we have been up to on the IMLS project. Please feel free to stop by our window at the back of the museum and see what we’re working on – there is always something interesting on our desks. Keep your eyes peeled for our next Facebook Live, as well. As we continue to move into 2017 and are fully into the second half of the project, we are excited to continue our work and continue keeping you updated
Louise Stewart Beck is former IMLS Project Conservator at The Henry Ford.
Additional Readings:
- Surprising Stories from IMLS Discoveries
- The Allegheny Articulated Steam Locomotive: Technology Pushed to the Limit
- #InnovationNation: Power & Energy
- The Ingersoll-Rand Diesel-Electric Locomotive: Boxy but Significant
power, electricity, by Louise Stewart Beck, collections care, conservation, IMLS grant